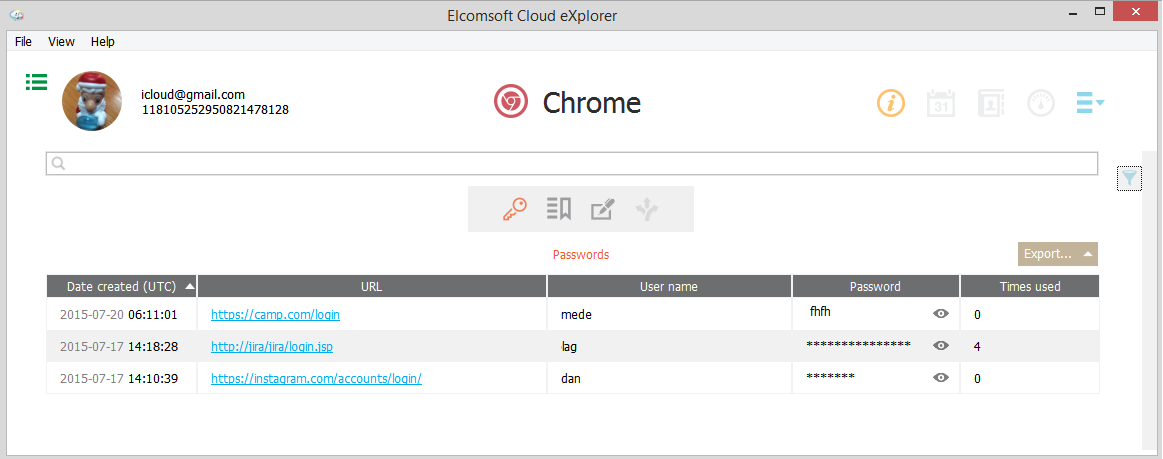
ECX allows you to explore Google Chrome data using the Chrome plugin.
NOTE: Some Chrome data may be encrypted with a passphrase (for more information, please see https://support.google.com/chrome/answer/1181035?hl=en). If you select to download the Chrome data category, and Chrome information in your Google account is encrypted with a passphrase, ECX requires you to enter this passphrase. If you enter the passphrase, all the Chrome data is downloaded. If you don't enter the passphrase, the encrypted data is not downloaded.
The Chrome plugin includes the following sections:
•Passwords
•Bookmarks
•Autofills
•Pages Transitions

To move to the desired section, click the corresponding icon in the gray rectangle area over the grid.
In the Passwords section of the Chrome plugin, you can view the user's saved passwords to different websites. You can find the following information:
•Date created
•URL (which you can click to open the page in your browser)
•User name
•Password (you can click the ![]() icon next to the password to view the characters)
icon next to the password to view the characters)
•Times used
In the Bookmarks section, you can view information on the user's bookmarked web pages, such as:
•Date created
•Title
•URL (which you can click to open the page in your browser)
•Folder (the folder where the bookmark is stored)
In the Autofills section, you can view information on the user's autofill forms on different websites. You can find the following information:
•Full name
•First name
•Middle name
•Last name
•Organization
•Street address
•City
•Postal code
•Country
•Phone
In the Pages Transitions section, you can view information on the websites which the user opened by entering their URLs into the address bar.
•Date created
•URL (which you can click to open the page in your browser)
•Hidden
You can export Chrome data to your computer by clicking the Export button.
Searching and Filtering
To perform searches in any section of the Chrome plugin, fill the search field and press Enter. The search results will be highlighted in yellow.
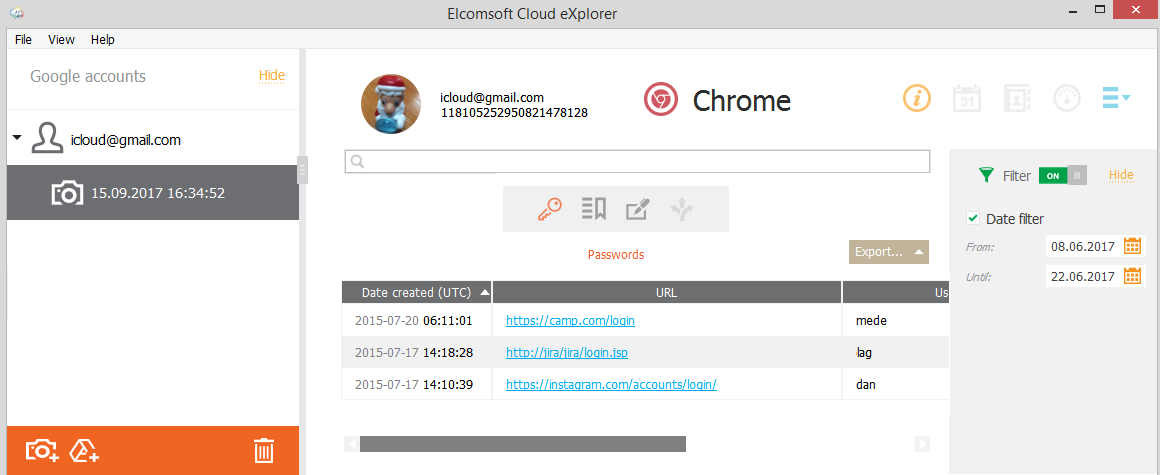
To filter out records in any section of the Chrome plugin, open the Filter pane by clicking the ![]() icon on the right.
icon on the right.
Enable filtering by switching the On/Off toggle, select the Date filter, and define the time interval in the From and Until fields.
You can export the Chrome data you have filtered. Click Export and select the Filtered option.
